I got a call one January morning from a homeowner outside of Meridian, Mississippi. She had noticed slow drains for a week but figured it would sort itself out. It didn’t. A hard freeze had moved in overnight, and by the time I arrived, the effluent line running from her tank to the drain field had a solid ice plug in it. We’re talking a full excavation in near-freezing mud to fix a problem that a few simple steps in November would have prevented entirely. That job ran her close to $1,800. If you want to winterize your septic system before the first hard freeze, that story is exactly why you’re reading the right post.
Here in the rural Southeast — Mississippi, Alabama, Georgia, the Tennessee Valley — people assume septic systems don’t freeze because our winters are mild. That assumption gets homeowners in trouble every single year. We don’t get the prolonged deep freezes of Minnesota, but we do get sudden hard freezes that drop soil temperatures fast, especially in sandy or loamy soils with shallow frost penetration. A single overnight drop to 18°F is enough to freeze a shallow effluent line or crack an exposed riser. I’ve seen it happen to systems that were only two years old.
In 18 years of installing, inspecting, and repairing septic systems across this region, I’ve learned exactly which steps matter and which ones are myths. This guide is what I’d tell my own neighbor before the first hard freeze hits. Let’s get into it.
Why Septic Systems Freeze — and What’s Actually at Risk
Most people think the tank itself freezes. In my experience, that almost never happens. A properly buried concrete or poly tank, sitting 18 to 36 inches below grade as most Southeast installations require, retains enough thermal mass from incoming wastewater to stay above freezing. The real vulnerabilities are the components closest to the surface: inlet and outlet baffles, effluent lines, distribution boxes, and any exposed risers or lids sitting above grade.
Effluent lines — the pipes carrying treated wastewater from the tank to the drain field — are typically buried only 6 to 12 inches deep in many rural Southeast installations. Some older systems I’ve inspected in north Alabama and east Tennessee run even shallower. When the ground freezes to that depth, those pipes can ice up completely. As a result, wastewater backs up into the tank, into the house, or both. That is a public health issue, not just an inconvenience. The EPA’s septic system guidelines and most state health department codes classify a sewage backup as an immediate sanitary hazard requiring emergency repair.
Distribution boxes — the concrete or plastic structures that split effluent flow across multiple drain field laterals — are another freeze point. They often sit just below the surface and can fill with standing water that freezes solid. I’ve dug up d-boxes in January that looked like someone had poured concrete into them. Specifically, older concrete d-boxes with hairline cracks let groundwater infiltrate and freeze much faster than intact poly models.
Step-by-Step: How to Winterize Your Septic System the Right Way
The best time to do this work is late October through mid-November in most of the Southeast — before the first hard freeze but after the summer heat has passed. Here’s the process I walk my own clients through every fall.
1. Get the Tank Pumped Before Winter
If you’re within a year or two of your recommended pump cycle — typically every 3 to 5 years for a 1,000-gallon tank serving a family of four — pump it before winter, not after. A full tank has less buffer space, and any disruption to the drain field’s absorption capacity during frozen ground conditions means you’re backing up fast. Pumping costs in this region run $200 to $350 depending on tank size and access. That’s cheap insurance.
I learned this the hard way on my own property early in my career. I skipped a pump cycle one fall because the system “seemed fine.” February came, the drain field got saturated from snowmelt on frozen ground, and I spent a weekend knee-deep in my own backyard. Never again. Now I tell every client: pump on schedule, and if you’re due within 18 months, move it up to fall.
2. Insulate Vulnerable Pipes and Risers
Any pipe or component within 12 inches of the surface is a candidate for insulation. The most cost-effective approach is adding 6 to 8 inches of mulch or straw directly over the effluent line route and the area around the tank lid. Straw bales cost $6 to $10 each and do an excellent job of slowing soil temperature drops. Avoid hay — it holds moisture and can introduce weed seeds into your drain field area.
For exposed PVC risers, I recommend foam pipe insulation sleeves — the kind sold at any hardware store for under $5 per section. Wrap the riser column and secure it with waterproof tape. However, the most important insulation upgrade is replacing an old flat lid with an insulated domed cover, which I’ll cover in the product section below. That single change makes a measurable difference in sub-freezing temperatures.
3. Check and Protect the Distribution Box
Locate your d-box — it’s typically 10 to 20 feet downslope from the tank, in line with the drain field. Dig down carefully to inspect the lid and check for cracks. Concrete d-boxes on systems older than 20 years often have deteriorating seals. A cracked d-box lid lets in surface water that freezes and pushes apart the inlet pipe connections. I’ve seen this damage distribution boxes beyond repair — a new poly d-box runs $80 to $150 in parts alone, plus labor.
After inspection, cover the d-box area with 6 to 8 inches of straw mulch. Mark the location with a small flag or stake so you don’t lose track of it under snow cover. That last step sounds obvious, but I’ve watched homeowners accidentally drive over their d-box in winter because they couldn’t see where it was buried.
4. Maintain Regular Water Use Through Cold Spells
This one surprises people. A septic system that sees consistent warm wastewater flowing through it is far less likely to freeze than one sitting idle. If you’re leaving a vacation home or seasonal property unoccupied for weeks during winter, that system is at serious risk. Warm effluent — typically entering the tank between 60°F and 70°F — keeps the internal temperature well above freezing even when it’s cold outside.
That said, don’t run excessive water trying to “keep things warm.” That can actually overload a cold drain field and cause surfacing effluent, which is a code violation in every state I’ve worked in. Normal household use is exactly what the system needs. Specifically, if a property will be vacant for more than two weeks during a hard freeze period, call a professional to winterize the entire plumbing system — not just the septic side.
5. Keep Vehicles and Heavy Equipment Off the Drain Field
Frozen ground feels solid, and people sometimes assume it’s safe to drive over a drain field in winter. It’s not. The freeze-thaw cycle already stresses the lateral pipes and aggregate in your absorption field. Adding vehicle weight on top of frozen, shifting soil is a reliable way to crack distribution laterals. Most state codes prohibit driving over drain fields year-round for exactly this reason, but winter makes the risk even higher.
Last fall I had a client in rural Georgia who let a firewood delivery truck back across his drain field twice in December. By February, two laterals had cracked and the field was surfacing effluent. Lateral repair ran $1,200. Mark your drain field boundaries with stakes before winter so delivery drivers, landscapers, and family members know where not to go.
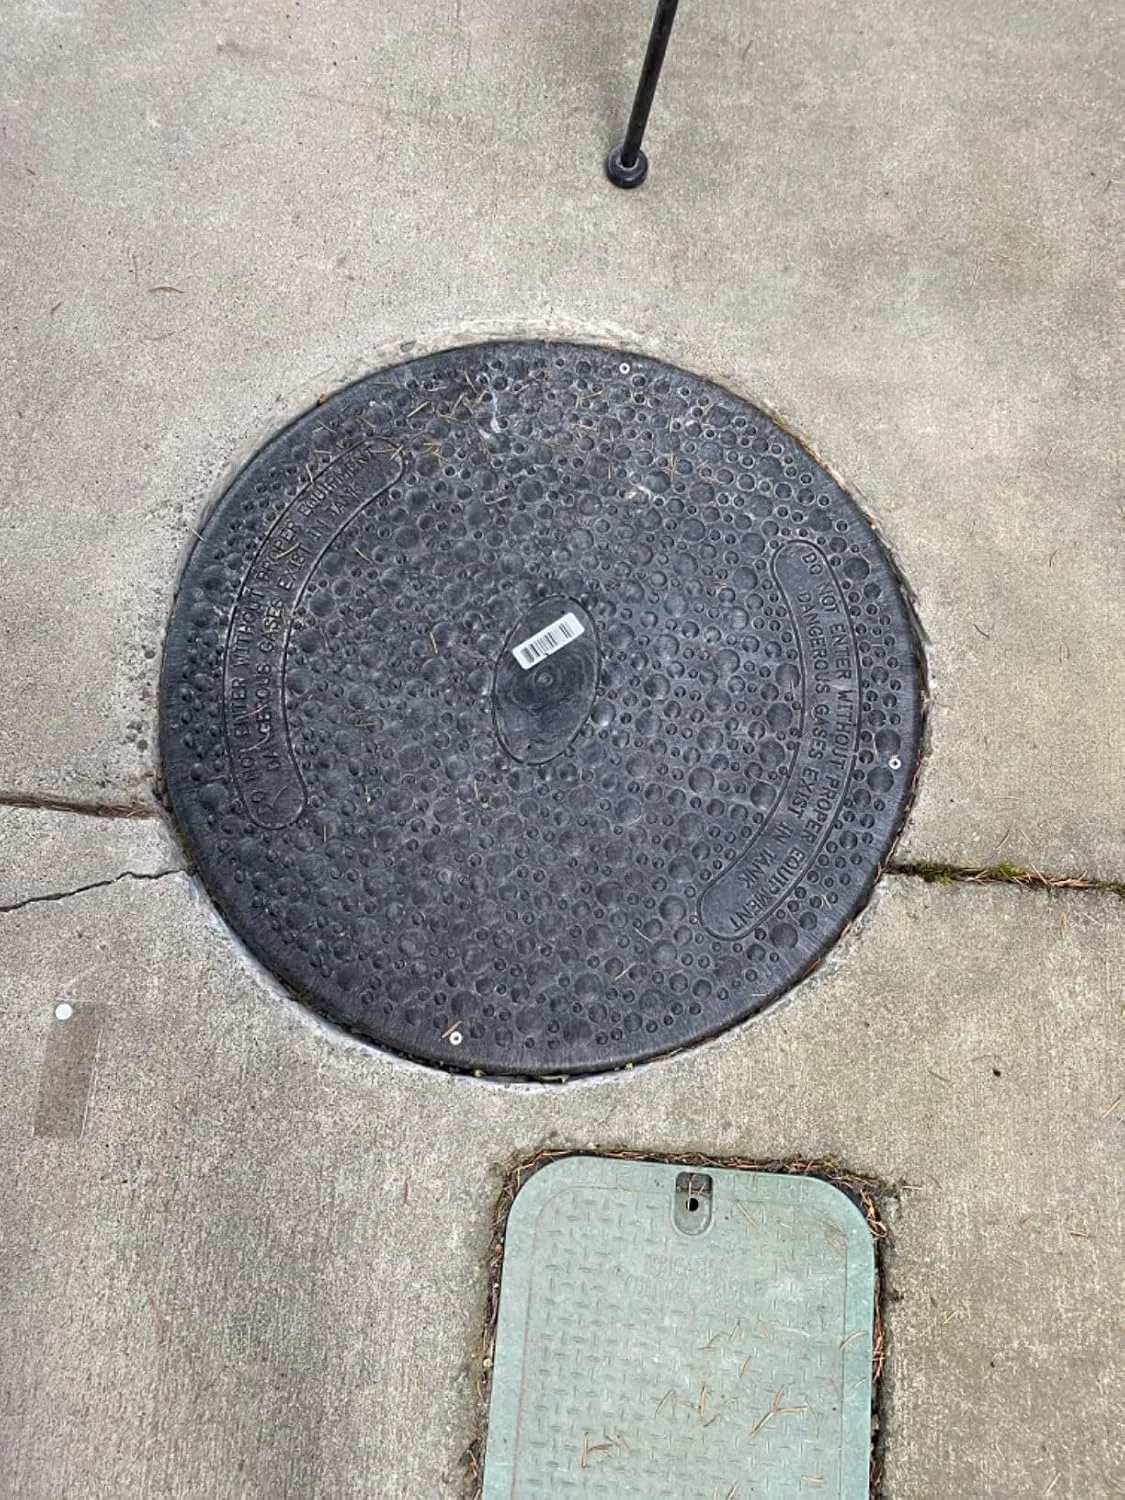
The Riser Cover That Kept My Tank Accessible Through Winter
One of the biggest mistakes I see homeowners make is leaving their septic tank access completely exposed to freezing temperatures. A solid riser cover isn’t just about keeping debris out—it’s about maintaining an insulating air pocket that keeps your tank and lines from freezing solid when the mercury drops.
What works
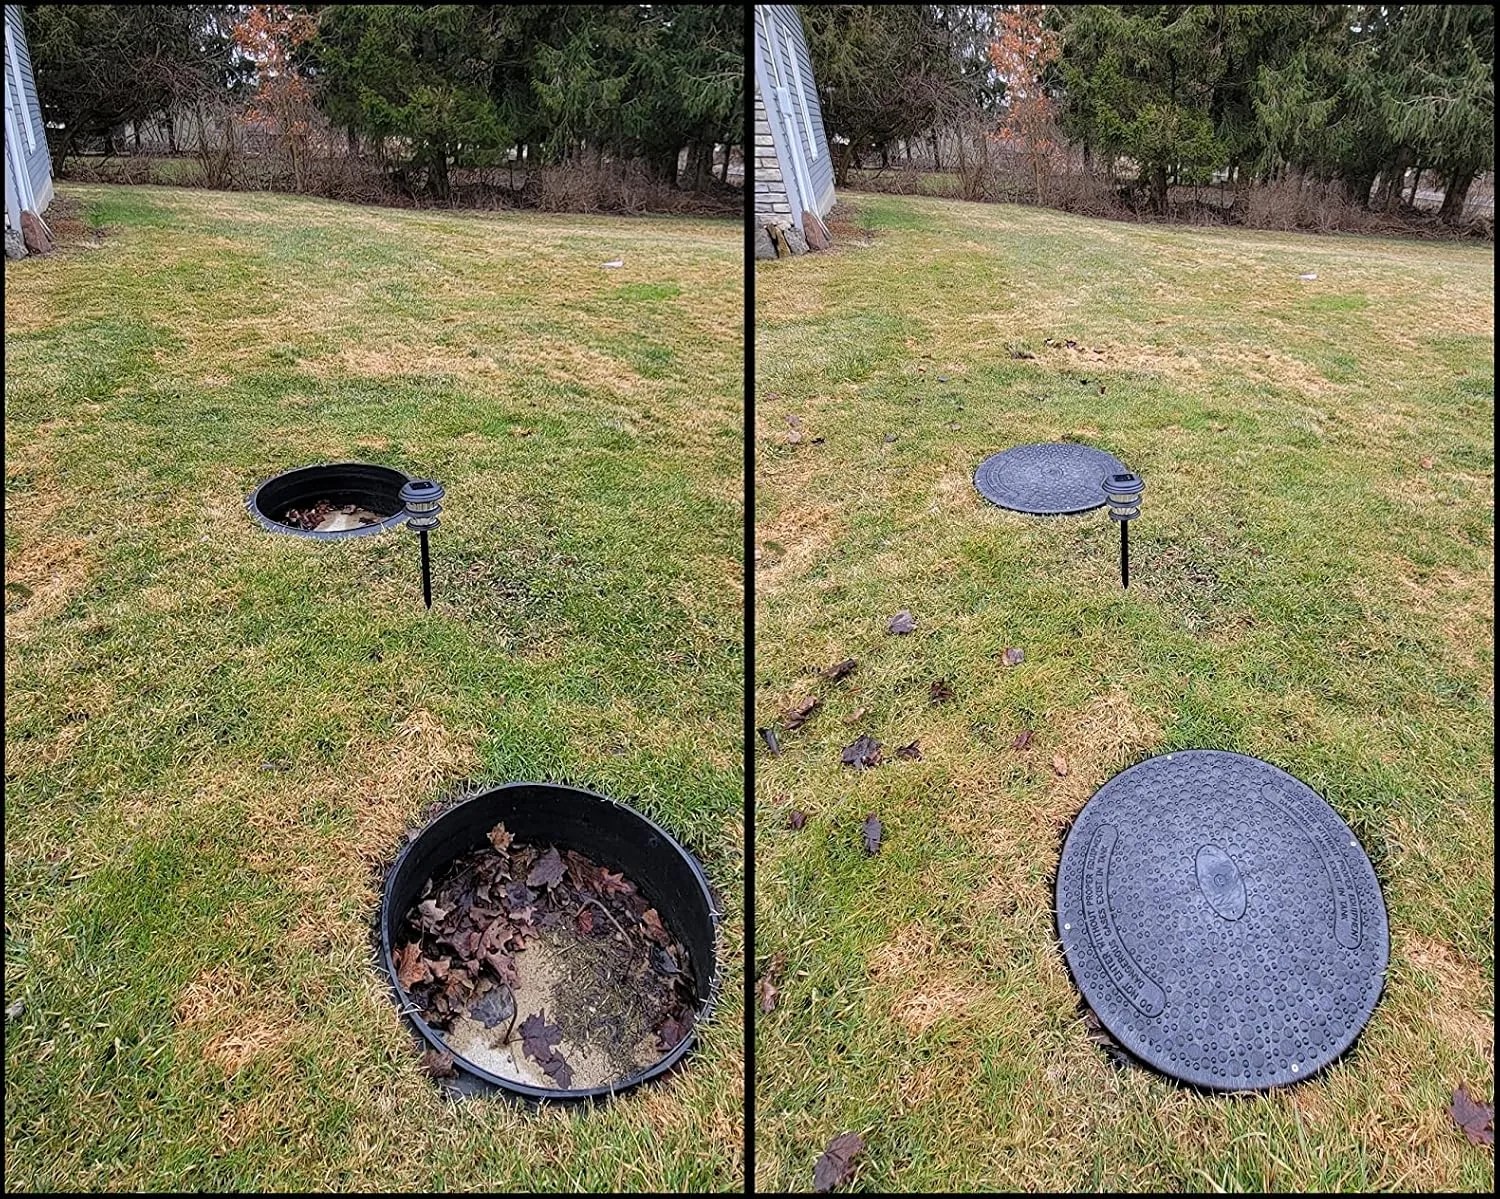
- The 24-inch diameter fits standard residential tanks and creates a genuine thermal barrier that keeps the tank itself several degrees warmer than outside air.
- I can still access my tank for inspections and pumping without removing heavy insulation—just lift the cover, do the work, and the insulation stays in place around it.
- Solid black construction absorbs what little winter sun exists, which actually helps prevent the worst temperature swings that crack pipes and freeze lines.
What doesn’t
- This alone won’t protect your effluent lines running to the drain field—you still need to insulate those separately with pipe wrap or foam sleeves.
- Installation requires either a pre-existing riser or the willingness to install one yourself, which adds cost if you’re starting from ground zero.
I almost talked myself out of installing one my first November, thinking it was overkill, but that call from the Meridian homeowner made me realize I’d been gambling with a system that costs thousands to repair. Jackel Black 24 Inch Diameter Septic Tank Riser Cover (Model: SFRC24B) has been part of my winterization routine ever since.
This post contains affiliate links. As an Amazon Associate, I earn from qualifying purchases at no extra cost to you.