Author: Joel Grayson, Licensed Septic System Installer & Inspector | 18+ years of septic service across the rural Southeast
This post contains affiliate links. As an Amazon Associate, I earn from qualifying purchases at no extra cost to you.
Last spring, I got a call from a frustrated homeowner near Macon, Georgia. His aerobic treatment unit (ATU) had stopped spraying, and he’d already ordered what he thought was the replacement pump. When I arrived, I found he’d bought the wrong horsepower rating entirely. That $250 mistake turned into a $430 job because the new pump created too much head pressure and burned out his return pump within two weeks.
That’s the moment I realized most homeowners don’t understand that aerobic septic systems aren’t simple gravity tanks—they have multiple pumps doing different jobs. And when one fails, confusion costs money fast. In my 18 years installing and replacing these systems across Georgia, South Carolina, and Alabama, I’ve seen the same expensive mistakes repeat.
In this guide, I’m breaking down everything you need to know about aerobic septic system pump replacement: what each pump does, real costs from actual Southeast jobs, which pumps I recommend, and honestly, when you should and shouldn’t DIY. Let’s start with the confusion that costs homeowners the most.
Understanding ATU Pumps: Three Different Systems, Three Different Failures
Here’s what caught me off guard early in my career: aerobic treatment units aren’t one pump. They’re typically three. Most homeowners lump them together and panic when anything fails. That’s where the expensive mistakes start.
Your ATU has these three pump or compressor systems working together:
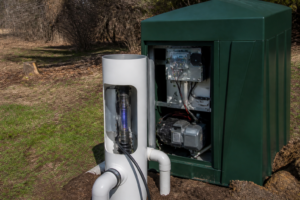
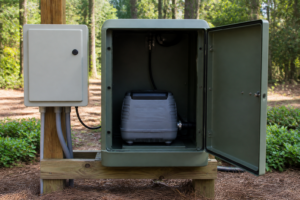
- Air pump (blower/compressor) — This isn’t technically a pump; it’s a compressor that pushes air into the aeration chamber to create the aerobic bacteria action that cleans your wastewater. Typically 1/2 to 1 HP, runs 115V or 230V depending on your unit model. I’ll cover this in detail in a sister post, but know this: if your alarm light is on and your spray heads are running fine, your air pump likely failed, not your spray pump.
- Spray or effluent pump — This is the submersible pump sitting in your disinfection vault (the final chamber before effluent goes to your drip field or spray heads). It’s the workhorse. Typically 1/2 HP, 115V, rated for 20 to 50 GPM at 10 to 20 feet of head. This is the pump most homeowners ask me about, and frankly, it’s the one that fails most often after 10-15 years of duty.
- Return or recirculation pump — This smaller pump (usually 1/4 to 1/3 HP) exists only in units with clarifiers—systems like Norweco, Orenco, and some SeptiTech models. It pumps settled sludge from the clarifier back up into the aeration chamber to be reprocessed. Smaller pump, fewer failures overall, but when it goes, your clarifier backs up fast.
The reason I’m being so specific: knowing which pump failed saves you hundreds of dollars. You don’t need a new air pump if your sprayers just died. And you don’t need a new spray pump if your float switch got stuck. Let’s talk about how to tell the difference.
Recognizing Pump Failure: Spray Pump vs. Return Pump vs. Air Pump
In 18 years, I’ve learned to diagnose ATU failures in the first 90 seconds by looking at two things: what the homeowner reports and what I see in the vault. Here’s how to tell which pump is actually failing.
Spray Pump Failure Symptoms
The spray or effluent pump is failing if you see these signs:
- Spray heads stop rotating or producing mist entirely
- Alarm light on your control panel is illuminated (usually red)
- Effluent backs up visibly in the disinfection vault when you open the lid
- No water is flowing to the drip field lines
The failure is usually mechanical. The impeller inside the submersible pump wears out after 12-18 years of continuous cycling. I’ve pumped systems where sand or sediment bypassed the filters and scoured the impeller blade flat. It just stops moving water.
Return Pump Failure (Clarifier-Based Systems)
If your ATU has a clarifier (you’ll see it labeled on the control panel), watch for these warning signs:
- Clarifier chamber visibly fills with thick sludge
- Effluent going to spray heads turns cloudy, milky, or dark brown
- Spray heads start clogging despite the spray pump still running
- You see hair, solids, or debris in the spray mist
What’s happening: sludge isn’t being returned to the aeration chamber for reprocessing. It accumulates, degrades water quality, and clogs your distribution system downstream. This is actually worse long-term than a spray pump failure because bad effluent damages your drip field faster.
Air Pump Failure (The One Homeowners Mistake Most)
Here’s the critical part: your air pump failing doesn’t mean your spray heads stop moving. They’ll still run if the spray pump is working. What you’ll see instead:
- Alarm light is on or flashing
- Spray heads are operating normally
- But the water quality in the aeration chamber is poor—brown, smelly, looks septic not aerobic
Without air, you’ve got a fancy septic tank, not an aerobic treatment unit. Your effluent quality degrades rapidly. This is why understanding the difference matters: ordering a $250 spray pump when you actually need a $180 air compressor is a waste of money and time.
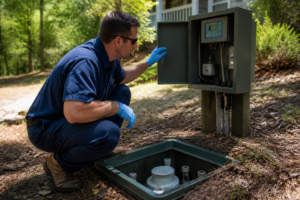
Before You Buy a New Pump: Check the Float Switch First
This single tip has saved my customers hundreds of dollars. Every submersible pump in an ATU relies on a float switch to trigger it on and off. The pump motor itself is often fine. The float gets stuck.
Here’s what I do in the field: I open the disinfection vault, locate the float (it’s a hollow ball or egg-shaped device tethered to a wire), and manually lift it by hand. If the pump kicks on immediately, you just saved yourself $200. The float is stuck or failed—you need a $15 replacement float switch, not a $250 pump.
Floats fail because mineral deposits, algae, or grease coat them and prevent free movement. I’ve seen it a hundred times in hard-water areas across Georgia and South Carolina. The homeowner calls panicked about a pump replacement. I test the float, order the part, and their system runs for another 3-5 years.
Before you open your wallet, take two minutes to test the float. You might not need a pump replacement at all. That’s the honest approach I’m giving you here—sometimes the simplest fix saves the most money.
Realistic Aerobic Septic System Pump Replacement Costs from Real Southeast Jobs
Let me give you actual numbers from jobs I’ve done in the past two years. These are rural Southeast prices, and they vary based on your location, your system brand, and whether you DIY or hire a professional.
Spray/Effluent Pump Replacement Costs
This is the most common replacement I see. The spray pump is your workhorse, and after 12-18 years, it wears out.
- Pump only (parts): $180–$350. Common spec pumps I install: Liberty Pumps LE51M (about $220), Goulds WE0311H (around $240), or SeptiTech-branded units (typically $200–$280 depending on head rating).
- Labor (if you call a professional): $150–$300. In rural areas, expect the higher end; service calls in town run cheaper.
- Total professional job: $330–$650 depending on your location and unit complexity.
That $330–$650 assumes a straightforward replacement. If the discharge line is corroded and needs replacement, add $100–$150. If the float switch is also shot, add $25–$40.
Return/Recirculation Pump Replacement Costs
- Pump only: $90–$200 (these are smaller units with less demand).
- Labor: $100–$200.
- Total: $190–$400.
Return pumps fail less often, but when they do, you feel it immediately in water quality. In my experience, replacing them within a week of failure prevents downstream drip field damage that costs thousands.
Air Pump/Compressor Replacement Costs
- Compressor unit: $120–$350 depending on your ATU model (SeptiTech, Norweco, Orenco, etc.).
- Service call labor: $100–$200 (usually straightforward swap if the electrical is already in place).
- Total: $220–$550.
Air pumps fail most often in summer or after extended power outages. I had a customer near Greenville, South Carolina, lose her air pump during a heat wave in July. System crashed on a Saturday. Cost her $480 to get a tech out and install a replacement.
These are realistic 2023–2024 prices from my actual invoices. Your costs may vary, but if someone quotes you significantly outside these ranges, get a second opinion. Pricing should be transparent, and parts shouldn’t cost more than what you see online.
DIY Aerobic Septic System Pump Replacement: When You Can Do It Safely
Let me be direct: replacing the spray (effluent) pump is one of the few aerobic septic repairs a capable homeowner can do safely and successfully. I’ve trained several customers to do it themselves, and when they follow the steps carefully, it works. However, this is NOT a task for someone uncomfortable with basic plumbing or working in confined spaces.
The air pump and return pump involve electrical work that I’d rather you leave to a professional. Mishandling 115V or 230V electrical in a wet environment is dangerous. But the spray pump? That’s mechanical and straightforward if you respect the process.
Step-by-Step Spray Pump Replacement (DIY Safe Version)
- Turn off power at the breaker. Locate your control panel. Find the breaker for the spray pump circuit (usually labeled). Switch it off. Wait 30 seconds to ensure the capacitor drains. Don’t skip this step—live voltage in a wet vault is how people get hurt.
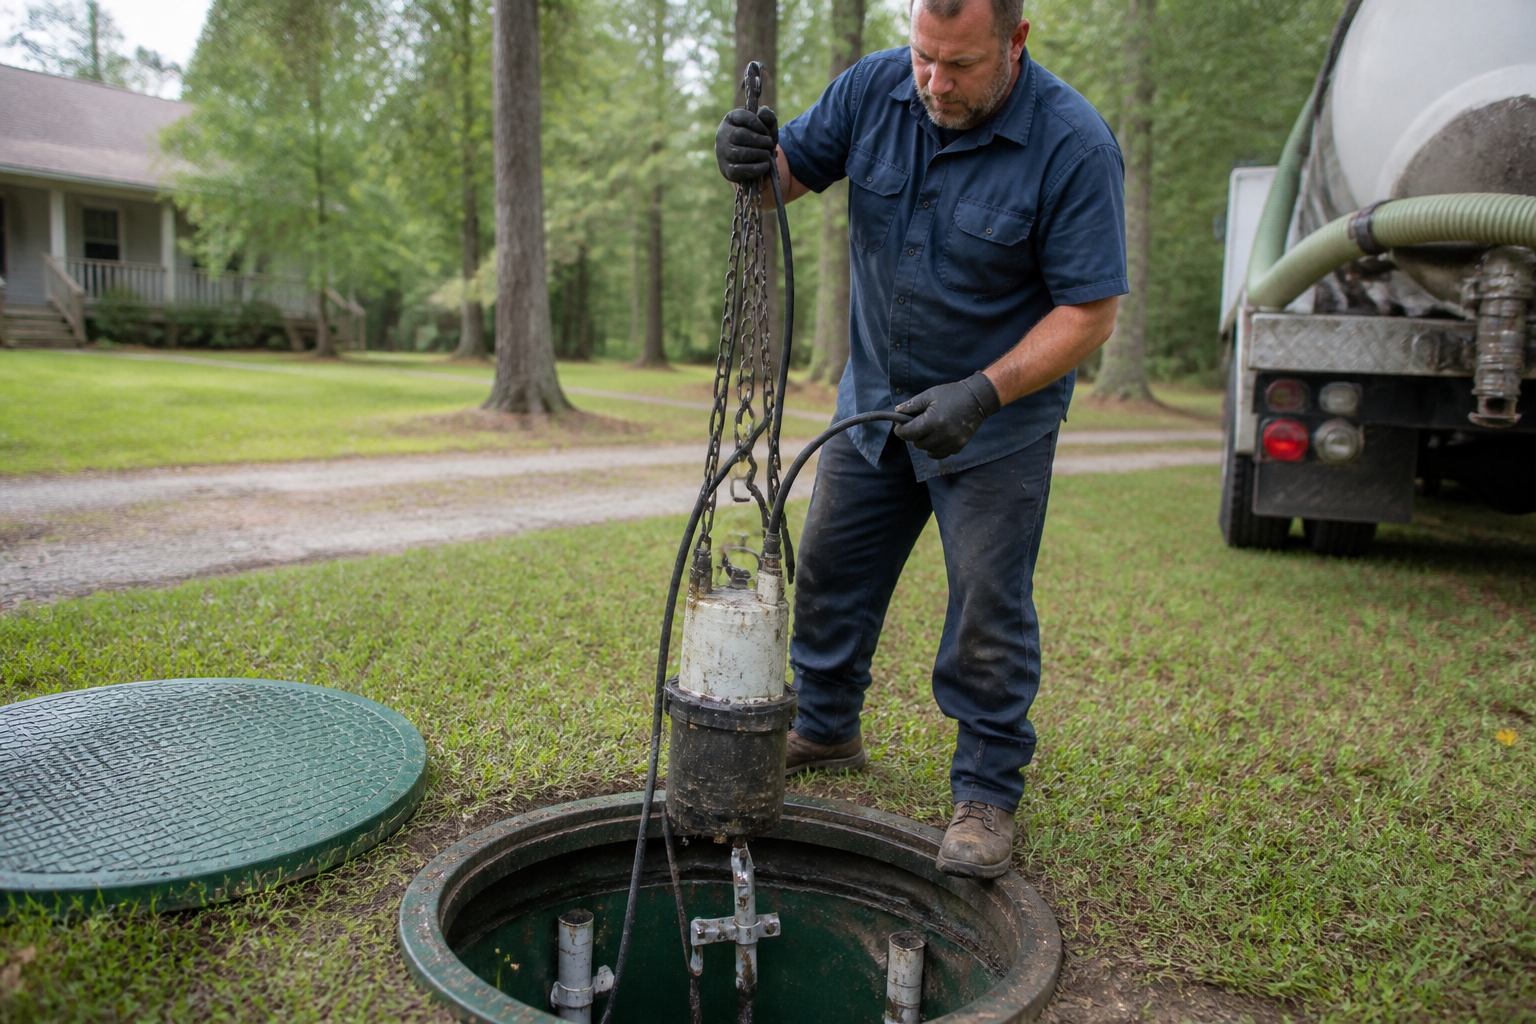
- Open the disinfection vault lid safely. These are heavy. Use a lid lifter or get help. Never try to wedge it open with your body underneath. Methane and hydrogen sulfide gases can accumulate in vaults. Crack the lid first, let it air for 5 minutes before fully opening. I’ve seen homeowners get lightheaded from not doing this.
- Locate the discharge union fitting. At the pump’s top, you’ll see a threaded fitting where the pressure line connects. This is usually a union (a three-part coupling). Loosen it with two wrenches—one holding the nut, one turning the union body. Water will drip; have a bucket ready.
- Examine how the current pump hangs. Most submersible pumps in ATUs hang from a rope or chain attached to a bracket on the vault lid or wall. Note which direction the float faces. Floats are directional—point the replacement the same way or it won’t trigger properly.
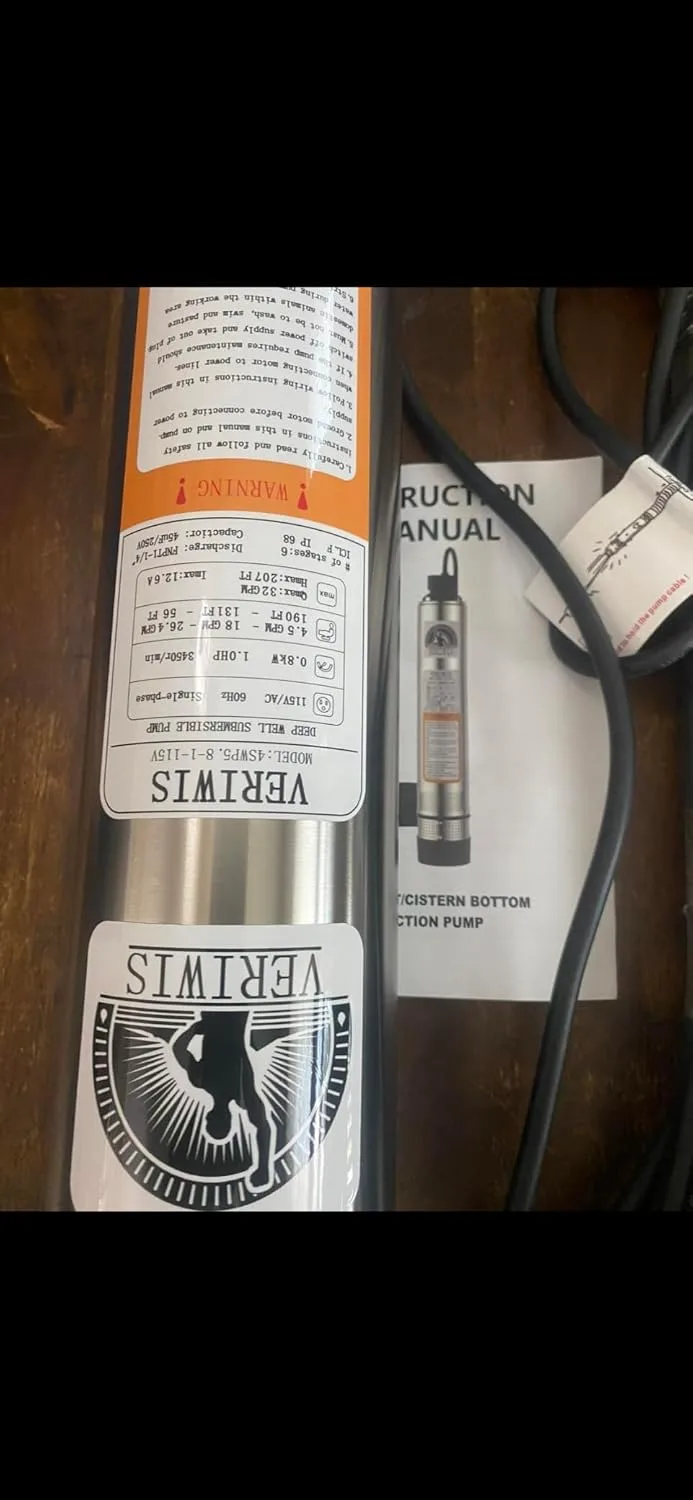
- Read the nameplate on the old pump. Before you order a replacement, note the horsepower (usually 1/2 HP for spray pumps), voltage (115V or 230V), and if visible, the GPM and head rating. Write these down. This is where the Georgia homeowner made his $250 mistake—he didn’t check the nameplate.
- Check the cord length. The electrical cord from the pump control box needs enough slack to reach the replacement pump. Measure from the control box to where the pump sits (usually 15–25 feet). Most replacement pumps come with 33-foot cords, which works for most residential systems. If yours is unusually long, you may need a custom cord length—this is where I’d call a tech.
- Drop the new pump into the vault. Gently lower it by rope or hand. Position it the same way the old pump hung—float orientation matters. Once it’s sitting on the vault bottom, reattach the rope or chain to secure it.
- Reconnect the discharge union fitting. Hand-tighten the union first, then use wrenches to snug it. Don’t over-tighten—you’ll crack the plastic fitting. Snug and stop.
- Close the vault lid. Secure it fully. There should be no gaps.
- Restore power at the breaker. Switch it back on. The pump should prime and begin cycling within 30 seconds to 2 minutes.
- Check spray heads within 3 minutes. Walk your yard and look at each spray head. They should be misting water in proper arcs. If one or more are dead, you may have an air lock in the line—open the isolation valve on that zone for 10 seconds to bleed air. If all heads are working, you’re done.
- The 26 GPM / 138 FT head rating matches mid-range aerobic systems perfectly—enough flow for spray heads without oversizing and wasting energy.
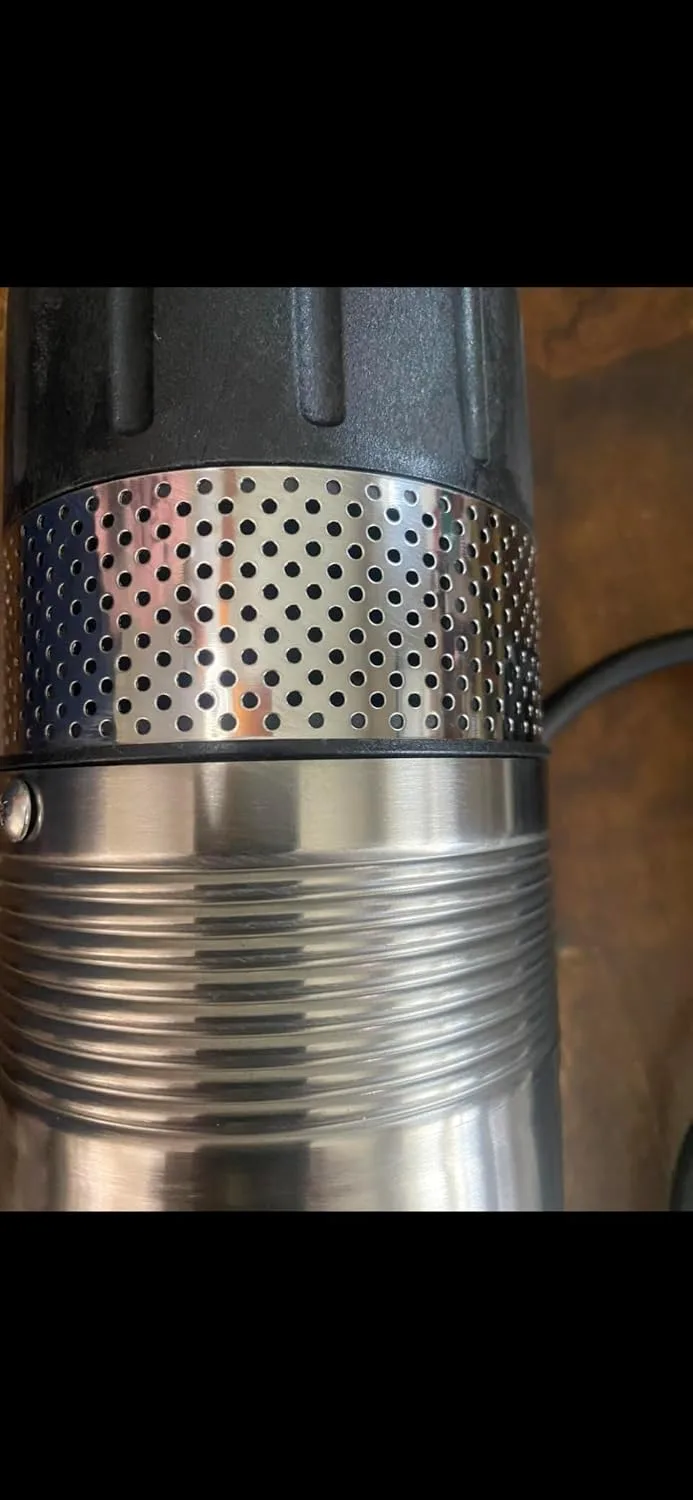
- Stainless steel housing and clog-resistant bottom suction mean this pump handles the real-world grit that settles in effluent lines; I’ve seen cheaper models seize up after one season of Georgia clay.
- The 33 FT cord comes pre-attached, which saved me from having to crimp a wet-location junction box in a pump chamber—one less point of failure.
- At 1/2 HP and 115V, it’s not a heavy-hitter for systems oversized or buried deeper than 35–40 feet; you may need to upgrade if your ATU sits lower.
- The 3-year warranty is solid but not bulletproof—submersible pump warranties often exclude wear parts and operator error, so don’t expect coverage if you run it dry or surge it with high voltage.
That’s it. Straightforward if you’re comfortable with basic mechanical work and safe around electrical panels. If any step makes you nervous, stop and call a professional. Pride isn’t worth electrocution or a flooded vault.
Why NOT to DIY Air Pump or Return Pump Replacement
Air pumps and return pumps connect to your electrical control panel. The wiring involves live voltage and capacitors that hold charge even after you kill the breaker. I’ve been shocked before—didn’t kill me, but it hurt and taught me respect for electrical systems. Unless you’re an electrician, leave these to a professional.
Misconnecting an air pump line can introduce air bubbles that damage the pump in weeks. Return pump discharge needs proper backcheck valves to prevent siphoning. These details matter. Get a pro.
The Pump That Stopped Me from Installing the Wrong Horsepower Again
Most DIYers (and honestly, some contractors) grab whatever 1/2 HP pump they find first, without checking head pressure or GPM ratings against their ATU specs. That’s how you end up with a system that runs but underperforms—or worse, burns out the motor in two seasons.
What works
What doesn’t
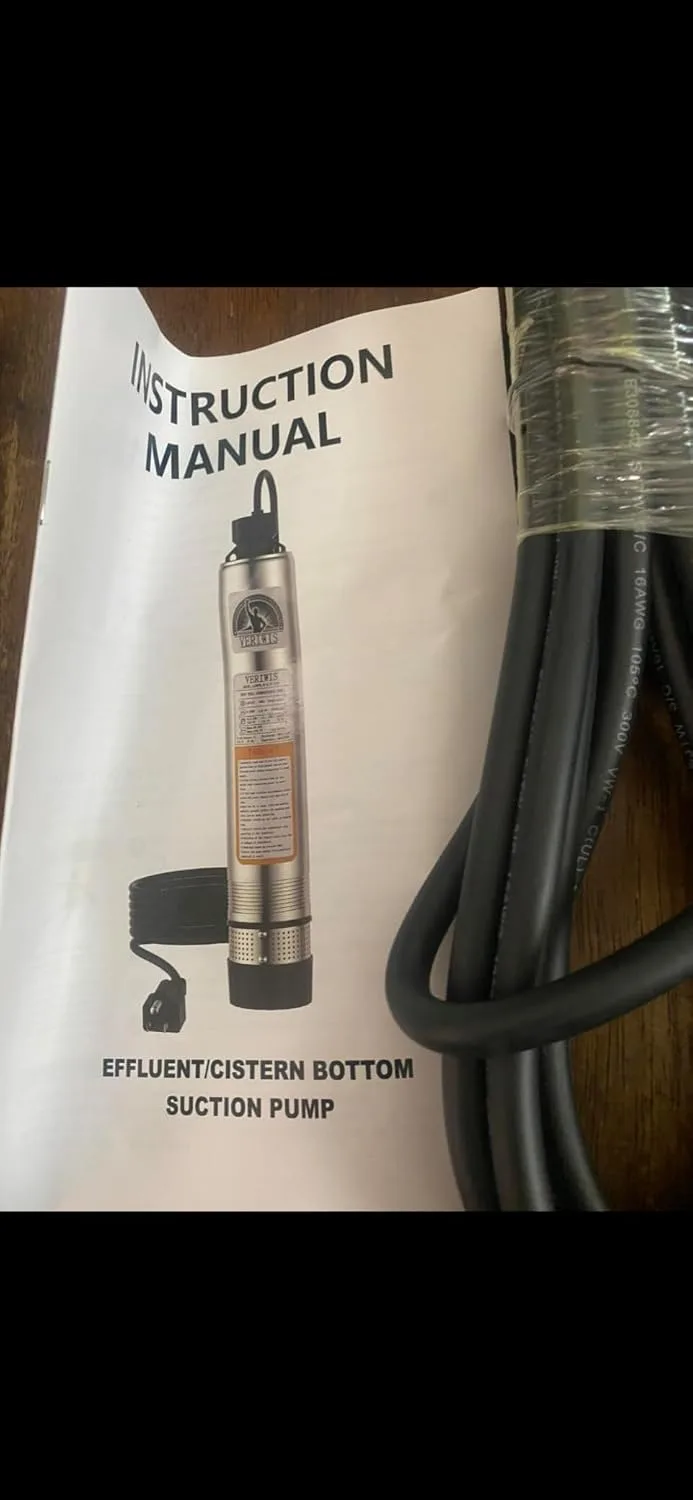
I almost ordered a 3/4 HP model before double-checking the system manual, which would have been overkill and cost me 40% more per year in electric bills. Check your ATU’s nameplate specs first, then grab the VERIWIS Septic Tank Pump 4″ Submersible Effluent Cistern Deep Well Pump with Clog-Resistant Bottom Suction 33FT UL Cord Stainless Steel for Irrigation 26GPM 138FT Head 1/2HP 115V (3-Year Warranty) if your system falls in that mid-range sweet spot.
This post contains affiliate links. As an Amazon Associate, I earn from qualifying purchases at no extra cost to you.